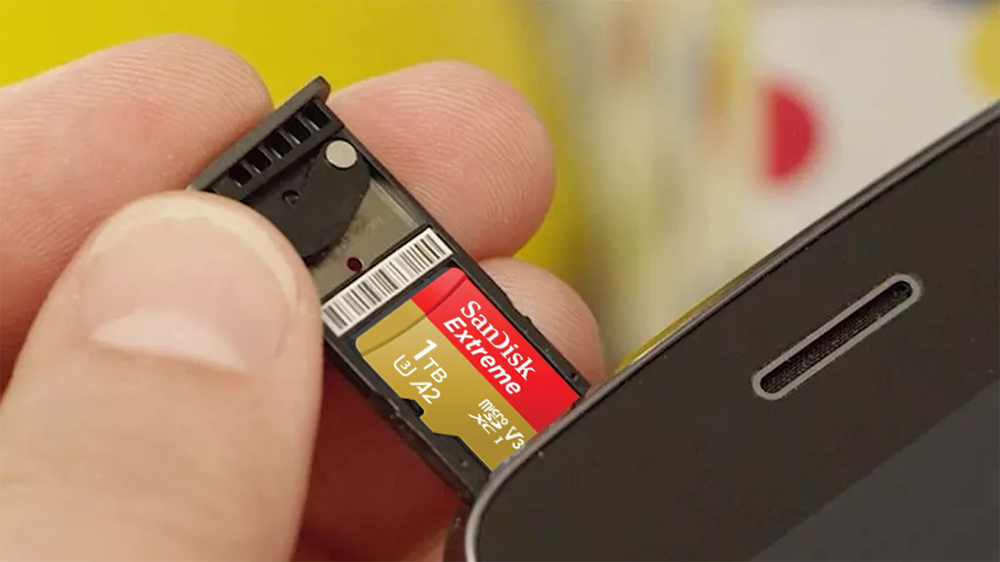
Flash storage has come a long way and it’s incredible that a full 1TB of data can fit inside a tiny chip literally smaller than your fingernail. Considering that my 4TB traditional hard drive from years ago is about as large as an actual brick, and as heavy as one too, it’s absolutely astounding that 4 of these fingernail-sized nearly-weightless chips have the same storage capacity as this huge brick, and similar speed too, compared with USB 3.0.
As it is, these massive 1TB Micro SD cards have come down dramatically in cost recently. We just picked one up at $140, after passing on it at $130 a week earlier, unfortunately. This is for nearly the highest-end 1TB MicroSD on the market, the Sandisk 1TB Extreme MicroSD Card. If you want the cutting edge, you can also get the Sandisk 1TB Extreme Pro MicroSD Card. It’s the same card, just a bit faster.
It’s a super-fast card capable of 4K UHD video recording, with transfer speeds of up to 160MB/s. Due to limitations from the system, cable, and file sizes, real-world in our experience is closer to 30MB/s, but this reduction is true among all devices capable of these speeds. Basically, whether you use USB3, super-fast SD cards, or other external drives, you’ll be limited by the weakest link in your system.
One of the biggest challenges with upgrading your phone or tablet’s external storage is transferring your data off the device. In our experience, just plugging in a cable from your phone to your computer isn’t going to cut it with huge amounts of file transfer from a micro SD. The system just wasn’t designed for that.
An additional challenge is getting your data onto the new card without data loss. The apps on your phone which use the external card, like ebook readers, backups, games, and other apps, all depend on hardware identifiers to see where the data is stored. Unfortunately, even in the latest versions of Android, this problem doesn’t have an easy solution – even though the solution is actually easy (it took me literally seconds to fix it).
The reason this is difficult is because every storage device has what is known as a Volume ID, that is, a string of numbers and letters (or just numbers) that identifies the storage device. This number is mostly random, so when you insert a new external storage card into your device such as a phone or tablet, it generates a unique identifier.
If you try to just copy over all your data to the new SD card, then you will get errors like this on apps which are looking for the file on the old path:
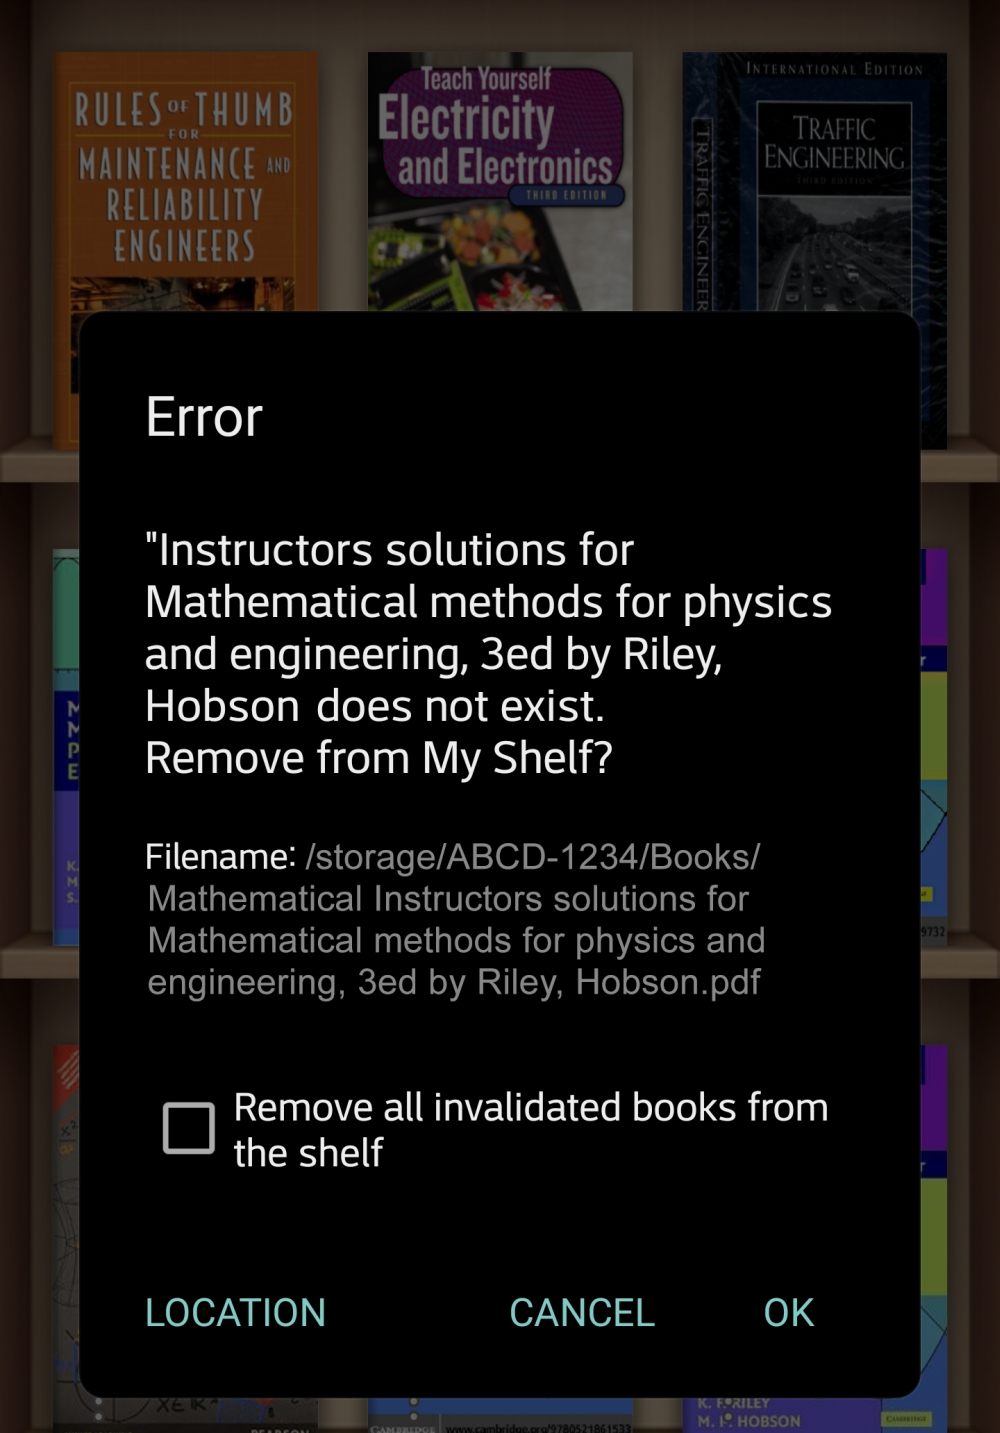
You’ll be able to see this identifier whenever you go to a file manager and go into your external storage. It will be a string of 8 numbers like this: ABCD-1234. That is not a real hexadecimal string, but it will look similar to that. Your old MicroSD card will have one particular string to identify it, and your new MicroSD will have a different one. As a result, any apps which use data on your MicroSD will no longer work.
That does have a relatively easy solution though. All you need to do is to change the VolumeID, also known as the Volume Serial Number, and the phone or tablet will recognize the new card as if it was the old card, after you cloned all the data.
There are a lot of ways to do this particular endeavor. You could use an app to transfer your data, or use an application in windows that clones the partition. But the way I will show you is in my opinion the most foolproof, if not the easiest. This is because it’s the raw transfer of data, and the direct changing of the VolumeID of the new card to the old one.
STEP 0: Back up your data to an external drive
It is highly recommended to back up your data. In some rare cases with some devices, changing the volume ID will result in android not being able to recognize the device. It will say unsupported and ask you to format it. If you backed up your data, then running into this problem won’t end up with data loss.
STEP 1: Find the VolumeID
The first thing you need to do is to find out the VolumeID of your current MicroSD or other external storage device. You can do this by using a File Manager, such as either the native Android File Manager, or another one like Smart File Manager which I like to use.
One way is to go to a final on your external storage, slick the menu to the right of the file and choose Properties, and you’ll be able to see your unique identifier in the URL of the file like shown below:
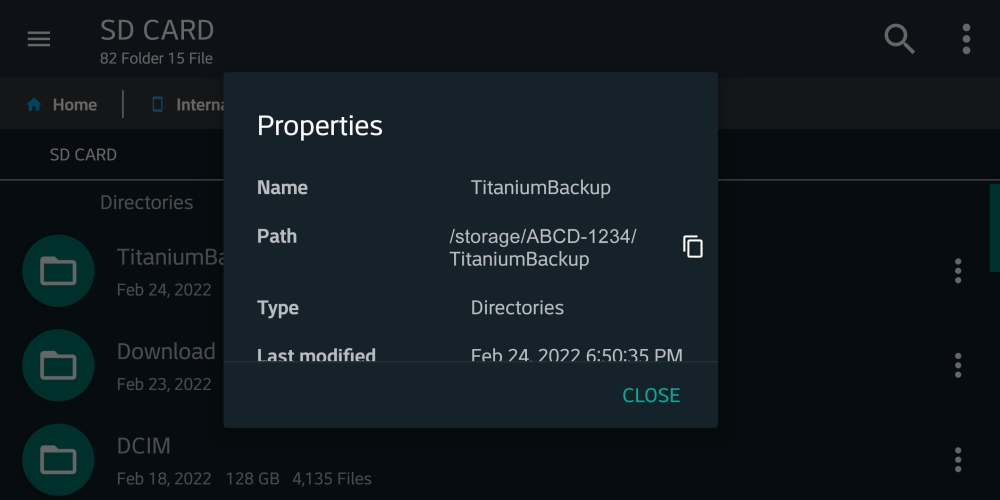
Take careful note of your VolumeID (the 8-digit letters & numbers similar to ABCD-1234). We recommend to take a screenshot, and also to write it down.
STEP 2: Unmount your MicroSD
To safely remove your MicroSD without data loss, first you need to unmount the card from your phone. That can usually be done via File Manager > Settings > Unmount SD Card. If not for your device, you can quickly google it to find out how to savely unmount your device. Since there are so many different devices, it wouldn’t make sense to put a tutorial here for it, and it’s pretty easy to do.
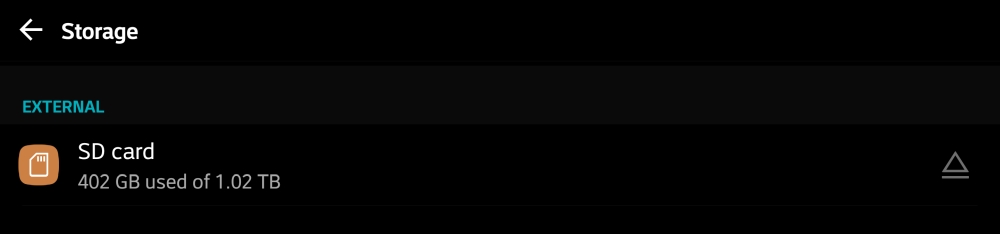
For our testing device, which was using Android 8.0, we went to Settings > Storage > and then there is a little icon to the right side of the SD card which is the button to unmount it.
STEP 3: Plug your MicroSD to your computer
You could have some trouble with this step if you don’t have a built-in card reader, or a good USB adapter. Sometimes if you have a problem, or it doesn’t connect, or the card is not read by Windows, or the transfer doesn’t work, or it’s too slow, it’s simply a problem with the transfer device.
If your laptop has a direct MicroSD slot, you’re in luck. This will definitely be the fastest way. But if not, I recommend this Transcend Card Reader, which is the one that I actually use, which is why I can recommend it. I upgraded to that one a couple years ago and it’s been working well, and supports both MicroSD and regular SD cards.
If you already have another card reader without a direct MicroSD slot, just use it using the MicroSD to SD adapter. It is my informed opinion that the less amount of adapters you use, the better. This is because there will be less potential bottlenecks that could slow down the transfer.
STEP 4: Rename the VolumeID on the new card
Now that you know the old card’s VolumeID, you now need to change it on the new one. This could be tough to do manually, especially if you’re not experienced with Linux; but it could also be easy with the right tools. We used AOMEI Partition Assistant Pro to complete this (only works in Pro or higher editions). To do it with AOMEI Partition Assistant, plug in the new MicroSD using a card reader, and do the following:
- Open AOMEI Partition Assistant with the new card plugged in directly to computer (via a card reader).
- Right click on the drive in AOMEI Partition Assistant – make very sure that you are choosing the correct drive! Double and triple check.
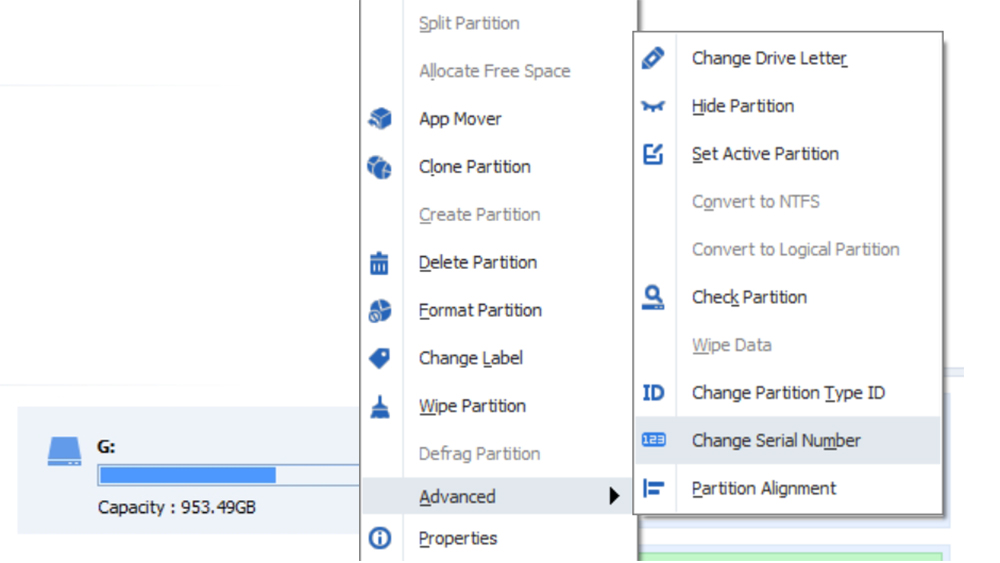
- Go to Advanced > Change Serial Number (this is for changing the VolumeID).
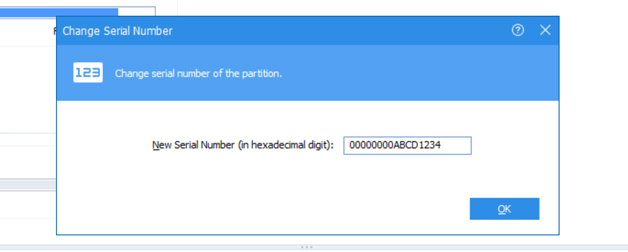
- You will be greeted by a window containing a long string of numbers with a bunch of zeros before the 8-character VolumeID. The last 8 characters is what you will change. Do not remove any of the zeros before the last 8 characters, keep them.
- Input the ID which you screenshot and wrote down from step 1, from your old MicroSD card. For example, you might do this:
00000000ABCD1234 > current VolumeID Serial that was on the new MicroSD that you will change.00000000EFGH5678 > enter your new VolumeID. If your old MicroSD’s VolumeID was EFGH-5678, it would be that. DO NOT ENTER THAT, only enter your real VolumeID. Above is an example ONLY.
After you click save and Apply in the top left (after double-checking everything), then your new MicroSD will have the same VolumeID as your old MicroSD.
STEP 4b: Using DiskGenius to change your VolumeID (Disk Serial)
If you don’t feel like buying AOMEI Partition Assistant Pro or higher, or don’t already own it, then there are other ways to complete the name change of the drive’s VolumeID.
There’s a free tool called DiskGenius which is another way to change your VolumeID.
DiskGenius
1. Select your drive.
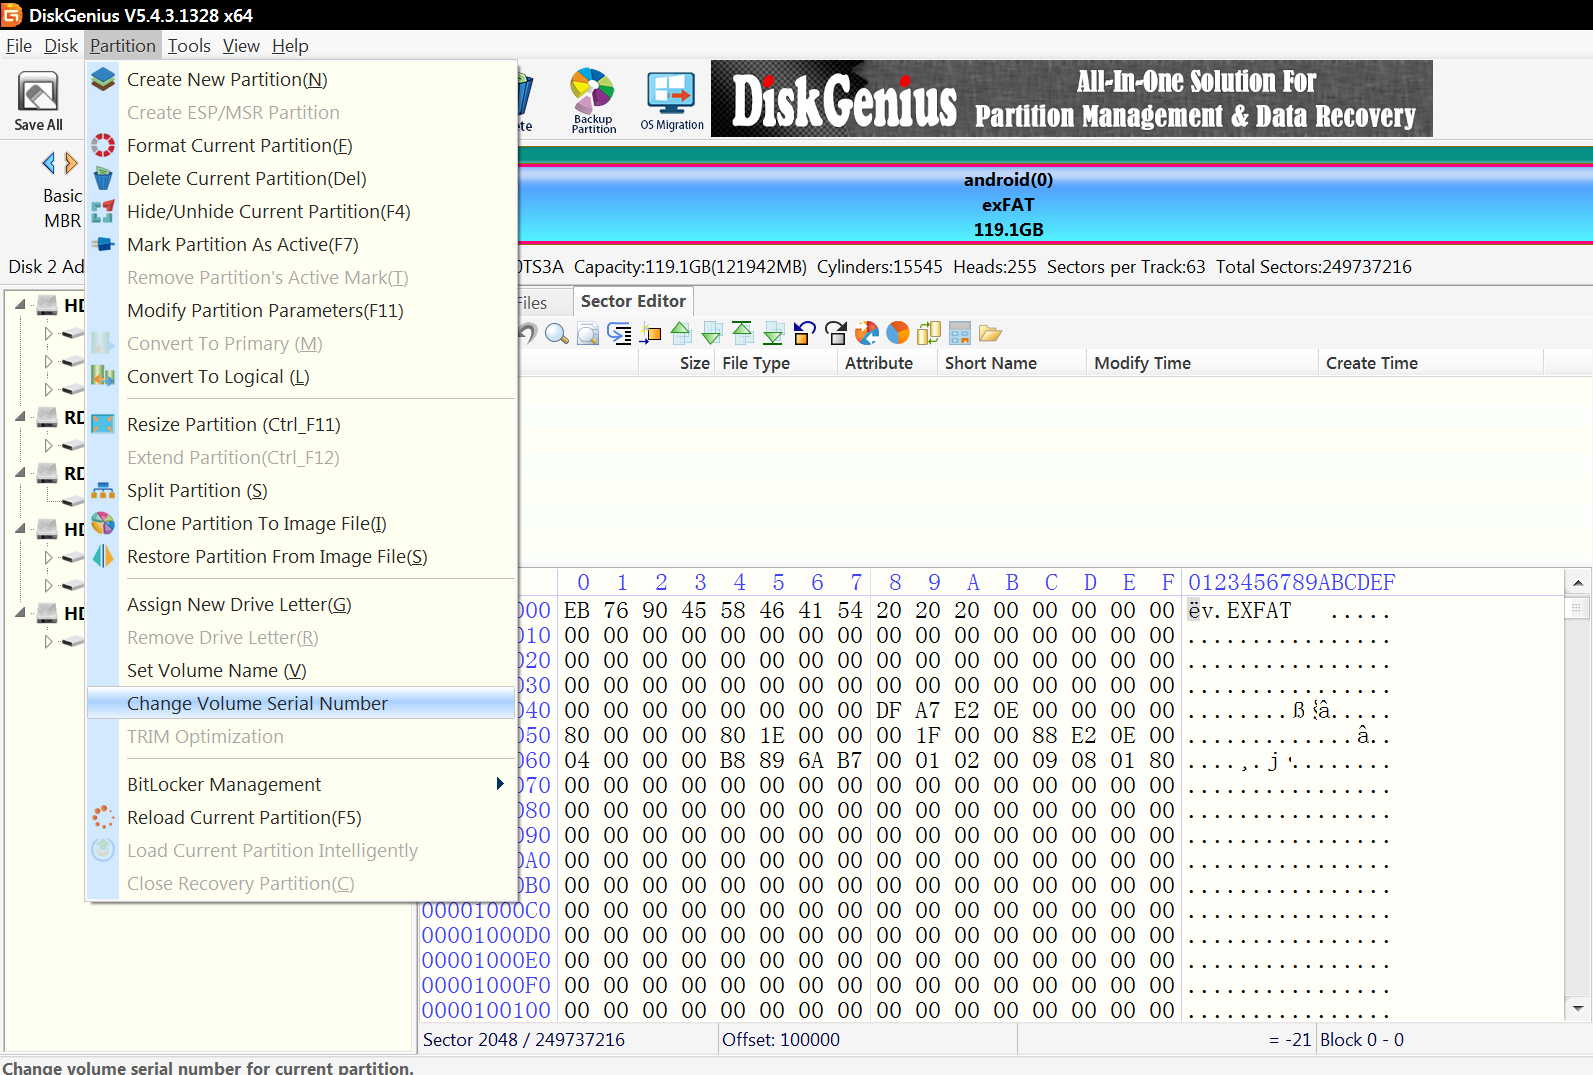
2. Go to Partition > Change Volume Serial Number
If the selection is greyed out, first remove the Hidden and Active flags:
Remove active flag

Remove hidden flag
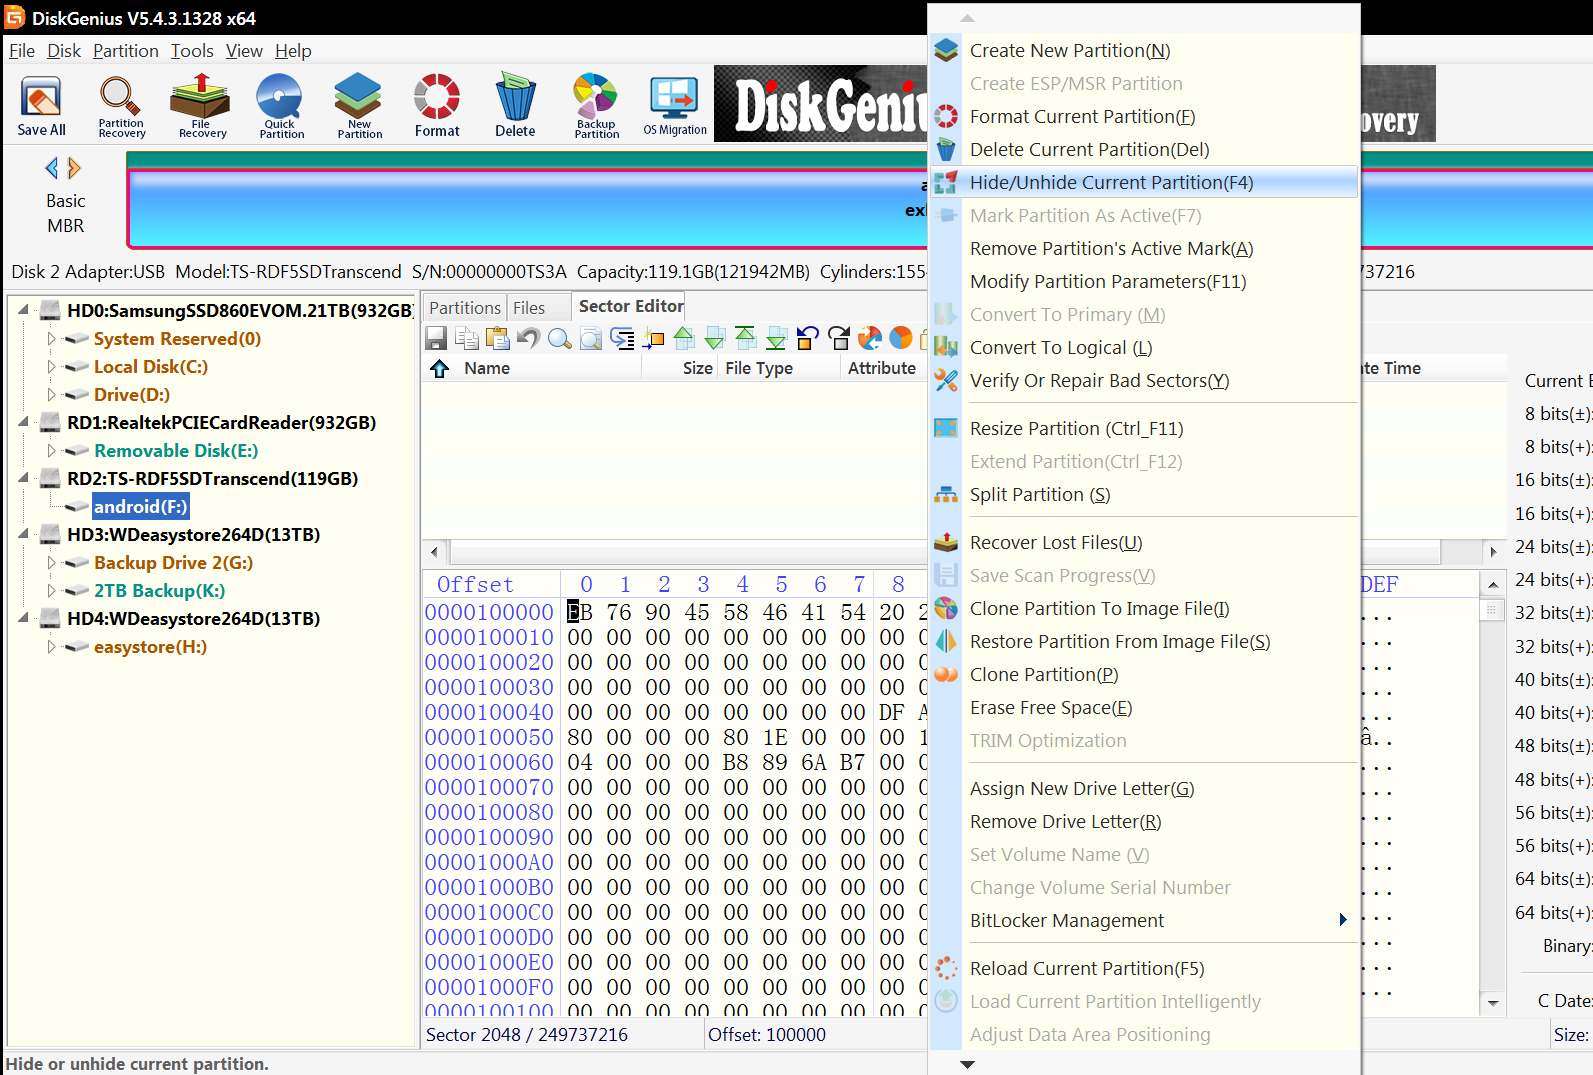
Save changes
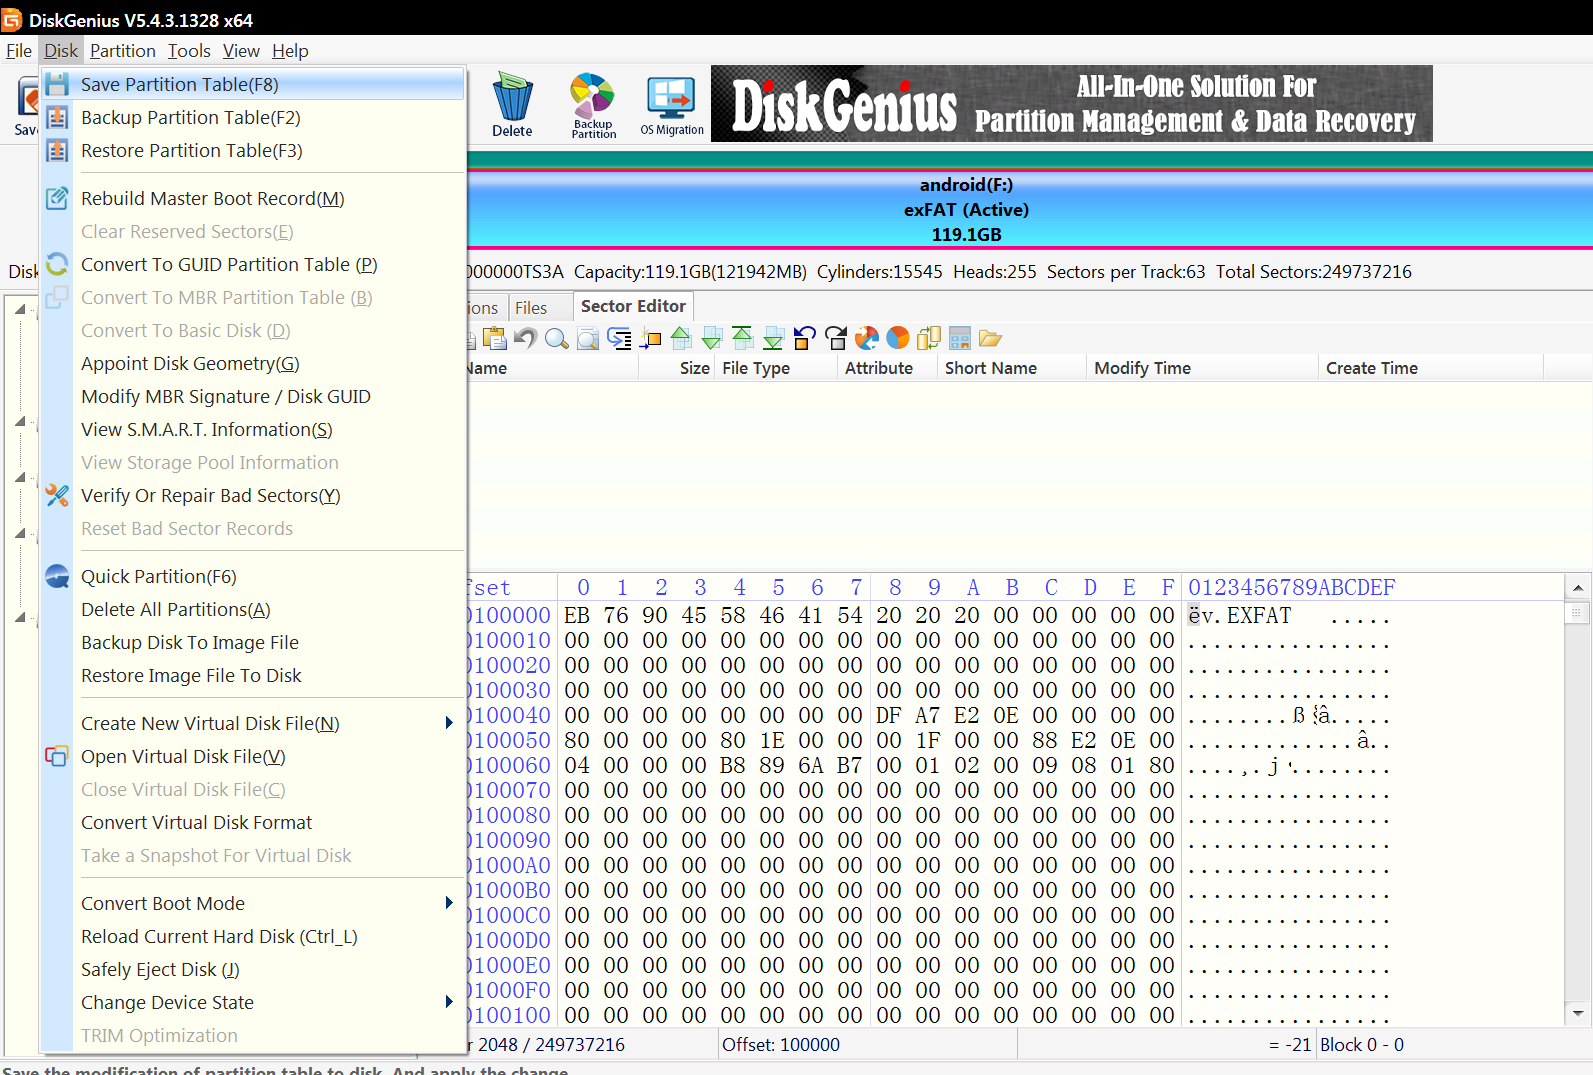
3. Go to Partition > Change Volume Serial Number, now you can change your VolumeID
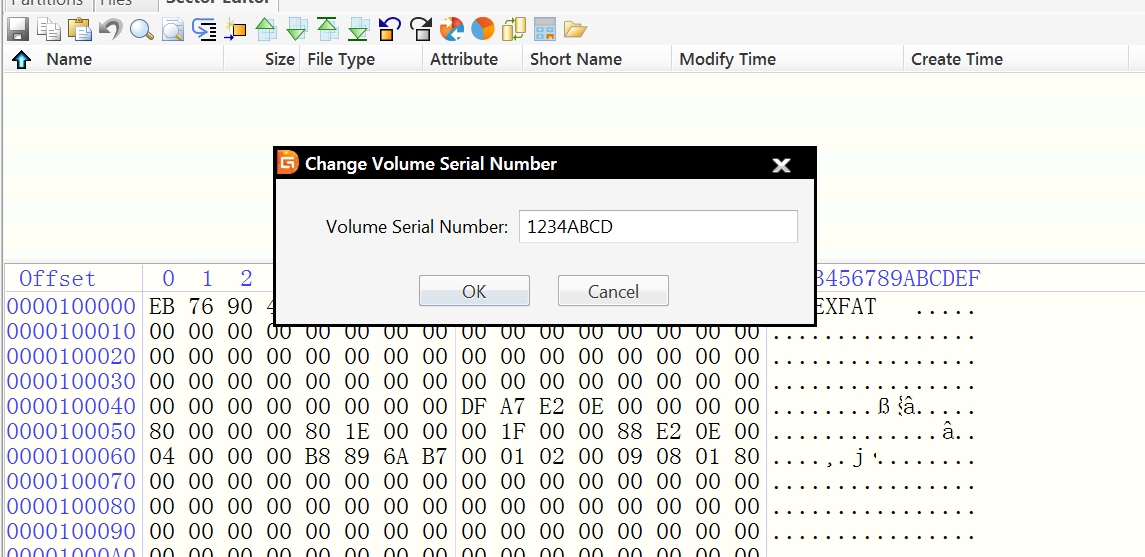
Save changes
STEP 4c: Another alternate tool: Sysinternals VolumeID
There’s also a free VolumeID utility from Microsoft that might work for you, as long as your card isn’t formatted as an exFAT card.
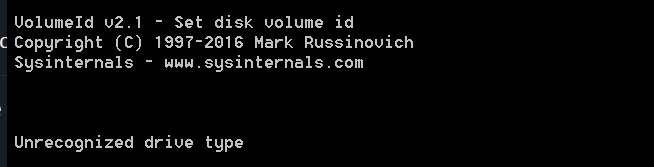
SysInternals VolumeID v2.1
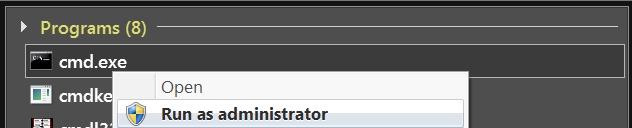
The SysInternals VolumeID application is not as easy to use, because it does not have a Graphical User Interface (GUI), so it means you have to use it over Command Prompt, which could be more challenging for those who are inexperienced. You might delete your hard drive or something – I’m not kidding. One little typo and you can delete your C drive. Only use it if you know what you’re doing.
Use it like this:
– Run command prompt as administrator.
– Navigate to location where your sysinternals volumeid folder is, I recommend to drop it into the C drive root.
– Now just type like this:
volumeid
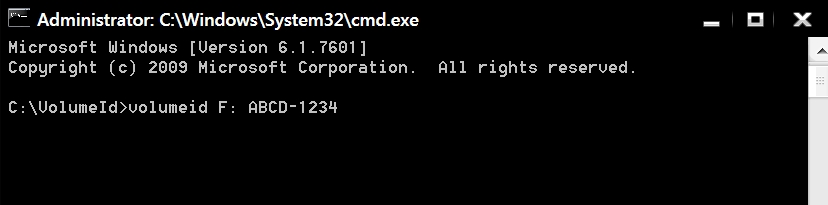
Also, Sysinternals VolumeID will not work if you are using exFAT. If you try to use exFAT, then Sysinternals VolumeID will say, “unrecognized drive type”.
Fat32 works, but it is the older version and has more limitations. NTFS is supported on Windows, but not Android. So, you might not be able to use Sysinternals VolumeID, especially if you have a large SD card.
STEP 4d: Other tools to rename the VolumeID
HxD is a hex editor for advanced users. DiskGenius above also has a hex editor. But this is not the fastest or most efficient way.
To use HxD, search for the string of your VolumeID like 1234ABCD, and replace all instances with the serial you want, such as 5678EFGH.
You could also try to google to see if you can find any other free utilities, but the above utilites will do what you need.
After you completed changing your VolumeID for the new MicroSD to the VolumeID of the old MicroSD, the card will work with all the apps on your phone or tablet as if you still had the original MicroSD in there. It will be seamless. Next, you need to migrate your data to the new card.
STEP 5: Check to see if changing the VolumeID worked
Before you transfer data to the new MicroSD card, make sure that your Android device recognized the SD card. This could save you a lot of time and frustration, as if it does not recognize the card after changing the VolumeID, then you won’t have lost all that time transferring data. In this case, you might be forced to format.
If you have to format the new card before transferring your data, to remove any chance of data loss, just make sure to use an app like oandbackupx (free open source app which replaced Titanium Backup) to backup the data from some apps which may be stored on the old SD card.
Unfortunately, if you cannot change the volumeID without Android forcing you to format, then some apps will not recognize the new SD card the same as the old one. If it’s possible to move your data to the internal SD before putting in the new SD card, then do that to minimize chances of this being a problem.
But if you changed VolumeID and your Android device recognizes the card without any issues, then you are good to go! Next, transfer your data.
STEP 6: Transfer your data
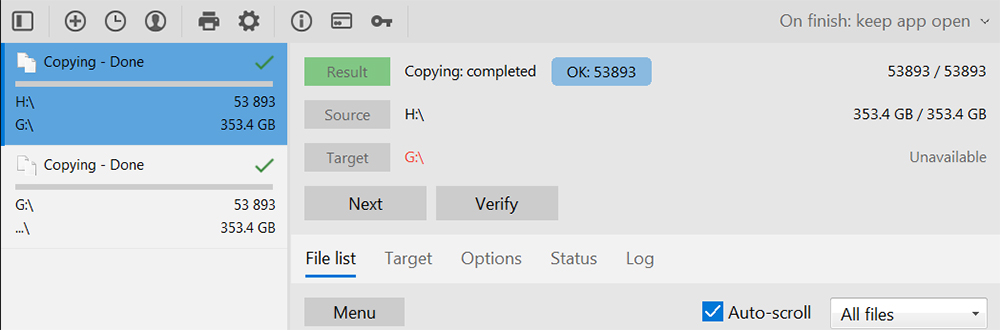
We strongly encourage you to complete the transfer using the free app Teracopy, which is way better than the native Windows file transfer manager. You can schedule, pause, and verify files, so it’s far better and far more convenient for huge transfers. We once transferred 50TB (50,000GB) of data using Teracopy, which took about a week. It’s free, too.
You’ll need either enough space in your computer, or an external drive, or a second card reader and spare USB slot, in order to back up the data. If you have a second card reader, you can cut your work in half by transferring it directly from the old card to the new card.
If you don’t have two card readers, then back up to your computer or external hard drive, and then swap out the SD cards. We recommend to let the card reader cool down first before swapping out to the new card to transfer the data back in. This process could take anywhere from an hour to a day depending on how much data you need to back up.
Now that you have the data copied from your old MicroSD to your new one, you’re ready to insert the new MicroSD back into your phone or tablet. Your new card will work exactly like your old card, and no data will be lost. Double check it all worked, and congratulations! Now it’s time to celebrate.


Thanks for teaching me how to correct the volume ID problem.
I’m actually searching for ways to change Android device’s external memory capacity limit. My current phone only allows up to 32GB, and now that there’s many high capacity SDXC memory card up to 1TB. I’m trying to figure out how to go beyond this limitation.